This is a photo tutorial on how I made my cart.
The original looked like this Instep Stroller/Bike Trailer over 8 years ago.
I used it a lot.
Then we moved and I couldn't.
Then we moved again and I could.
Then the straps and fabric started breaking and ripping.
I sat and looked at it knowing I could restyle it.
I removed all the fabric and added the board
(there are actually 2 boards for added strength),
(there are actually 2 boards for added strength),
I stapled the fabric over the board to make it pretty
and then attached the car seat base for the car seat to snap into.
It is very sturdy and comfy for the rider, she usually falls to sleep in it.


So, we have moved again and there is not a real great place to ride with the trailer
and my sad bike is all rusted from living in humid Arkansas.
I didn't want to get rid of the trailer though.
I worked hard on it and we had great fun using it.
I had this idea in my brain for another restyle.
I didn't know how to do it though.
I did a lot of searching online....nothing.
I thought.
I was on Pinterest searching "Rickshaw" when I found MuddyJ .
There it is!!!
I was so excited that I went out that day and got the supplies.
I put it together within a few days,
then had to wait for it to warm up so I could use it.
then had to wait for it to warm up so I could use it.

So here are the photos to look at to get an idea of how I put my Jaunting Cart together.
Photo above is the
bend in the front bar that crosses in front of me at my hips.
I
measured it and laid it on the sidewalk with some of it hanging off the
cement and bent it.
I had to jump on it at bit....these pipes are pretty
strong.
I then held it up on end next to me and bent it the rest of the
way with my foot.

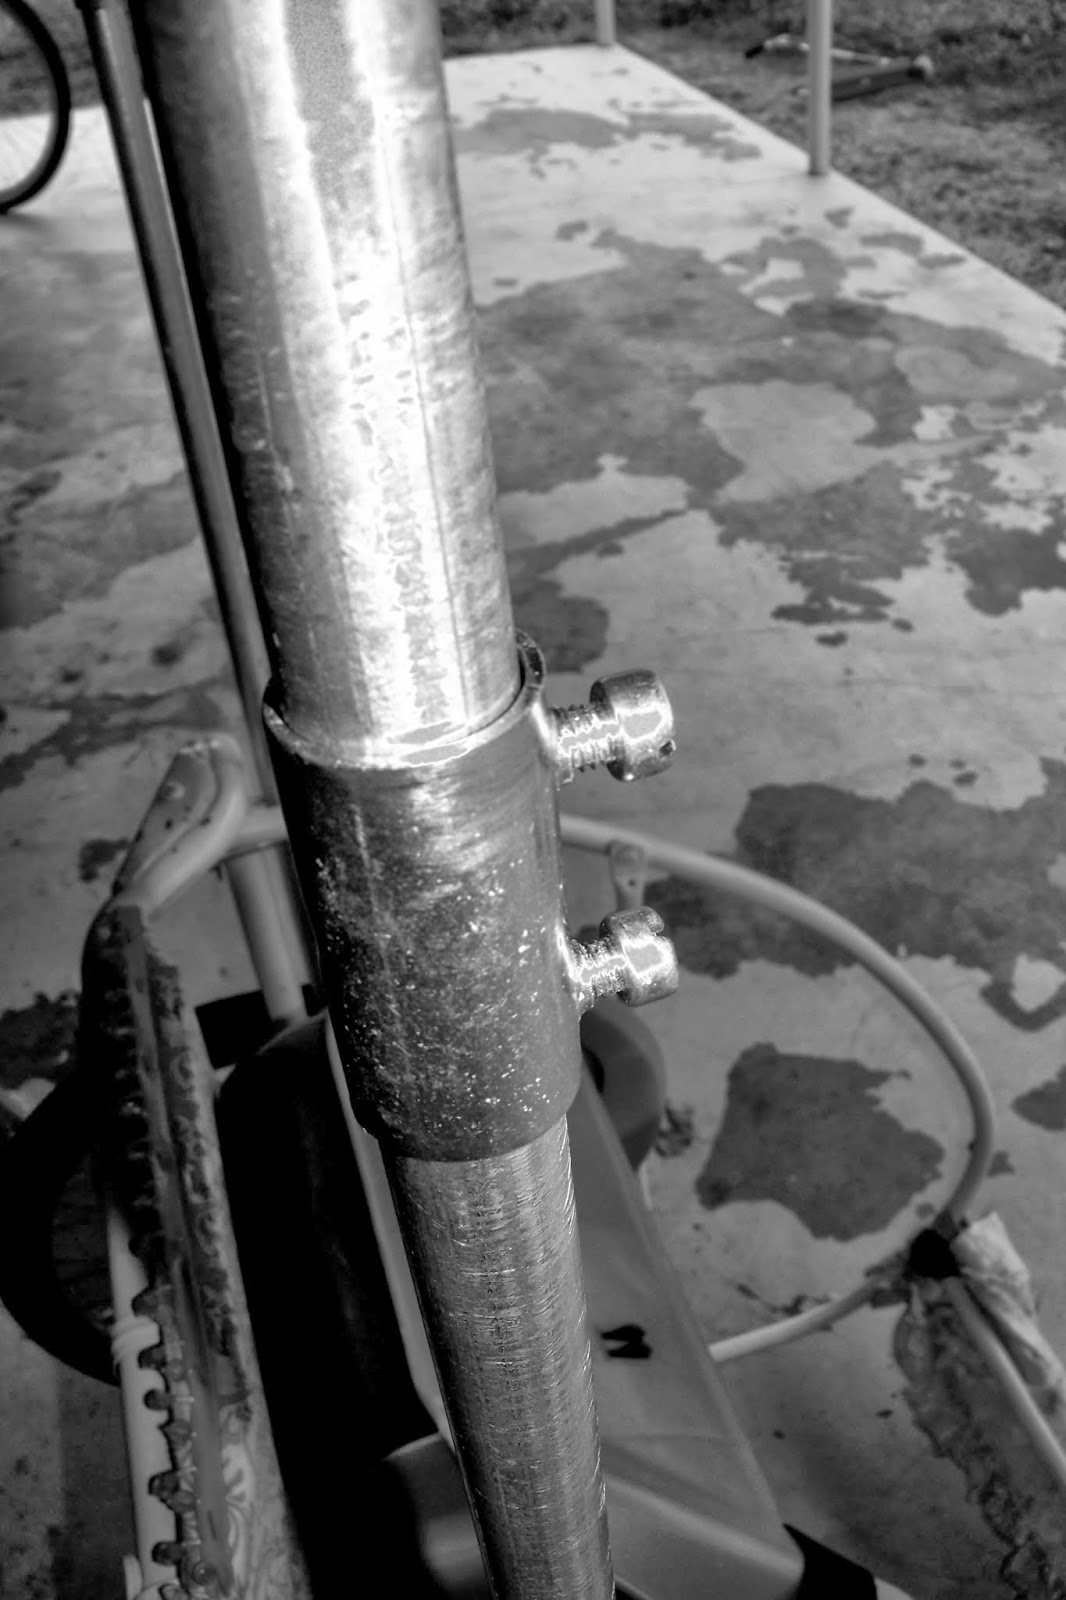
Photo above is the base of the car seat and the view of the screws
and washers used
to attach it to the wood platform that I attached to the trailer frame.

I wanted the connection to be straight across,
but
I didn't bend them to the right length.
The elbow joint helped join them perfectly.
The connector piece.

Front right showing one of the 4 U bolts I have on the cart.
This is where the trailer hitch arm extended from originally.
I removed that because I could not fold it under after the other restyle I made and I will not be using it with my bike anymore.

The straps that I bought for less than $6 at an Army Surplus store.
They are connected to the pipes with 4 carabiners.

Un-assembled

This
is the re-bar that I use inside the conduit pipe for extra
reinforcement.
It is 5 feet long.
The conduit pipe is strong,
but I
wanted to have a bit more support for it with all the walking and
jogging.

Conduit pipe with the re-bar before I put the handle bar on.


Rear left

Rear left view from the back.

Pool noodle, straps and connector for front bar.
Sorry about the pink hue...something is wrong with my camera.

Removable tires

The view of the underside.

Me with it assembled
My list of supplies:
4 conduit pipes
2 re-bars
1 elbow joint
4 conduit connecters
4 U bolts
4 carabiners
One pool noodle (using half)
straps from Army Surplus

This is it compared to my van.
I wanted the bars/handles to be long enough so that as I get stronger and start running,
that I don't get injured by hitting my feet on it behind me.
It just gives plenty of space for walking/jogging/running stride.
So that is it.
Please leave comments or any questions.
I will be posting photos and maybe funny things people say to me as I use it. :)
Thanks for visiting.