Cute

Tuesday, October 3, 2017

Fire Hose Punching Bag

Alright! Again, I come with news. 😄
My last post/video was about preparing for Gastric Bypass Surgery.
That is not happening!
That is totally ok!
I have been sick with hives which I believe comes from
Leaky Gut Syndrome.
It would not be a good idea to go in there and rearrange my insides
when my guts are not healthy.

So once again, my home is my Reducing Salon!
Seems to be a reoccurring theme in my life HAHA


So with that I am creating my space to exercise, get stronger and lose weight.
I have a few things I have made using damaged fire hose.
Damaged fire hose also means free fire hose.
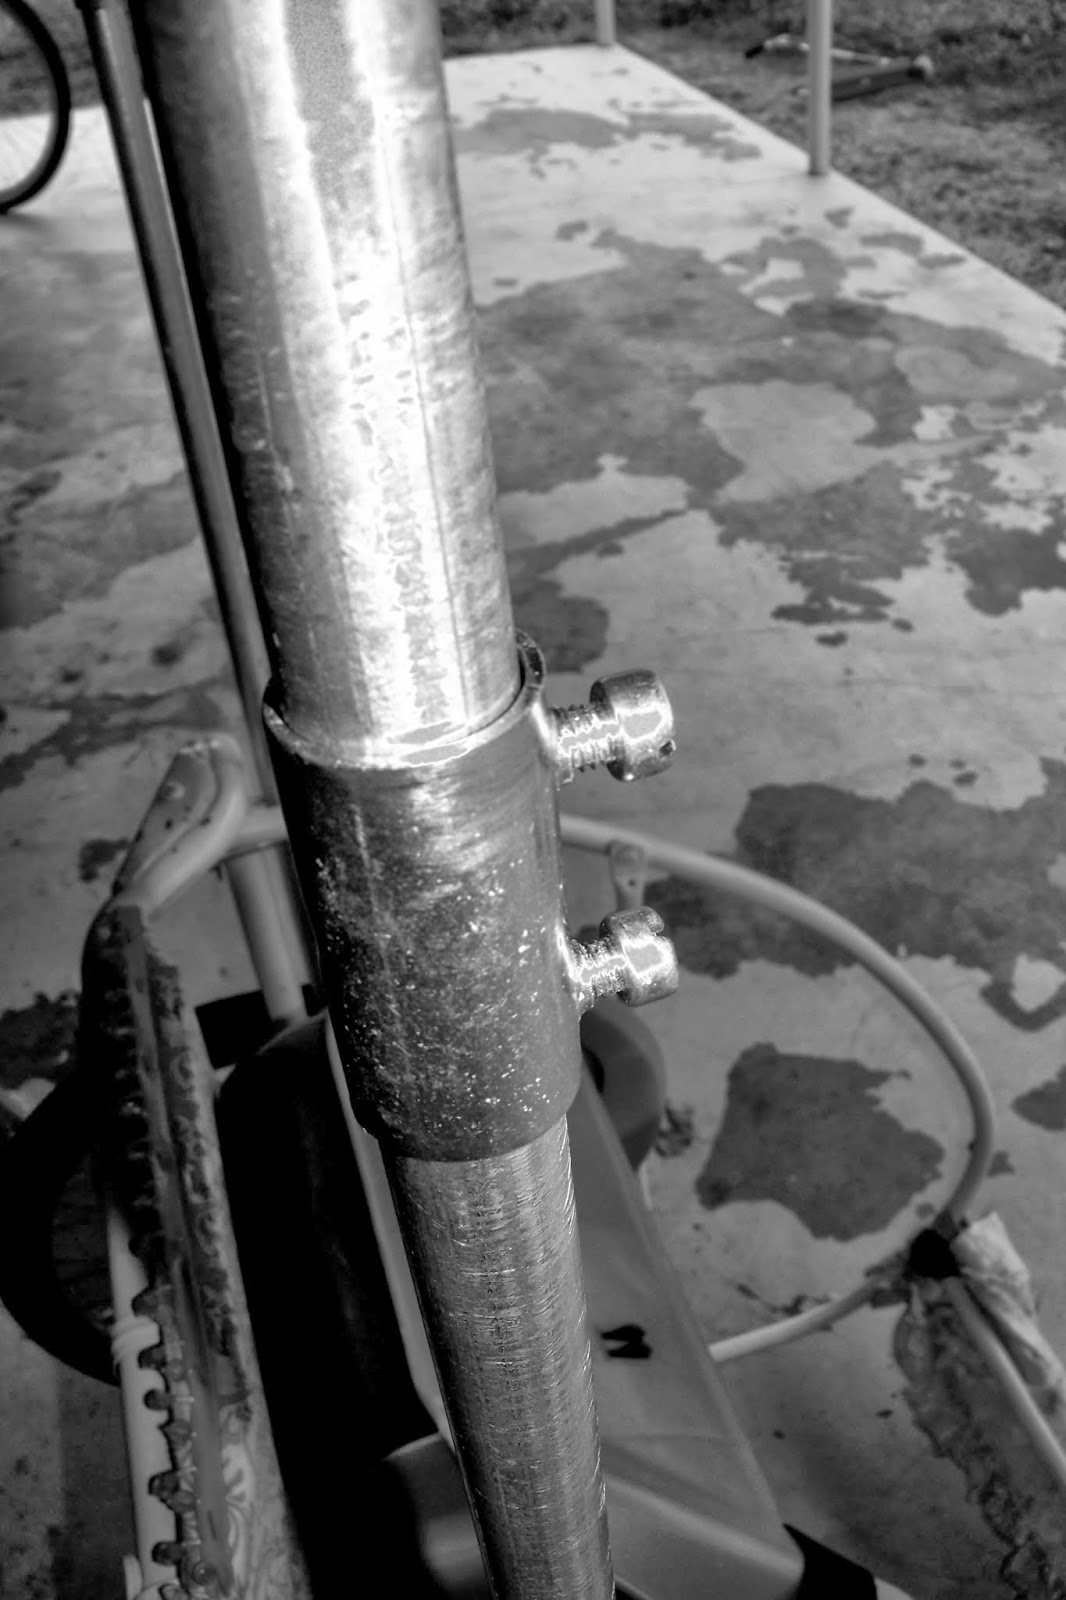
I have Battle Ropes made from hose anchored/wrapped 
around a post to our deck above our patio.

I am really not a punching bag type of girl,
BUT, 
I made a Punching Bag.
I will be one.

I could not find anything online to show me how to do it
or base my design on, so I did it on my own.
It is cool to see it done and it is pretty great!

I will share photos here that are pretty easy to see what I did to make it.
Please post any questions.
Although, I did not take any measurements, I just winged it.

So here are the photos....


The piles of hose shown in one of the photos is the hose I used. 
And I used ALL of it. 
It really used up a lot of hose filling the inside.
Rolls and rolls of hose in there. 
It is very heavy. I haven't weighed it yet, 
but I will when my husband helps me place an anchor on the underside deck and we move it. 

So go find some damaged hose and made one.
I feel I am "lucky" hahaha living in California and surrounded by wildfires
there is plenty of damaged fire hose.
That is not lucky hahaha
This hose is from the U.S. Forest Service Fire Dept.
Go ask your local Fire Fighters.
They are nice guys. They will have it, or they won't.
All they do with the damaged hose is throw it away.
This is a great recycle, re-purpose, reuse.
I need to go and get some more for my next Fire Hose exercise tool,
and other projects.


Go for it!
Thanks for checking it out.


Sunday, July 16, 2017

Monday, March 14, 2016

Bringing it back..

I am bringing my blog back to life here. 

I am juicing right now and feeling great. 

We are starting a garden and I will use the blog to document it. We were inspired by the new Joe Cross movie The Kid's Menu . We attended the screening in Hollywood with Joe and got to talk to him and all. It was great!
On our long drive home, we talked about how we could make a garden work at our home. We had learned about Grow Bags at a meeting at the Faulkner County Library in Conway, Arkansas. We learned about how to construct these bags and how they were being used in Africa. Our bags are quite different than those, but this was our thought process in using the fabric grocery bags as "grow boxes".
We have 35 bags so far. We bought them at Dollar General for 88 cents.
They will be placed in squares of 9 bags. 
There will be 16 squares, 9 bags each. That is 144 bags. 
We are doing our garden this way for two reasons. First is because we are in a rental and we would like to take it with us whenever we move. Our last big garden was back in 2012. To expand our previous year's plot, we spent over $200 on a Saturday (March 17th) and put it all together. Planted on Sunday. Monday evening on the 19th, my husband came home from work and let me know that we were being transferred to Oklahoma City on April 1st. Heartbreaking. We loved that place and all our friends we left there. AND our garden. 
Second reason is that the land around this house doesn't really have an area for a garden. We will be using a 48ft length of our dirt driveway that will work for placing the bags on.


I will be taking photos of our progress.

The kids are excited and so are we.

Sunday, June 16, 2013

A Link To My Old Blog

I had another blog (a few actually) before this one. But we cancelled our old email or something and I can't signin to it. SO SAD!! But here is the link. My last post was from 2010 after I found out i was pregnant with Miss Sue.

My Home is Now My Reducing Salon


 My first post there: Fit Thoughts

Thanks :)

Thursday, April 4, 2013

Photo Tutorial for My Rickshaw

This is a photo tutorial on how I made my cart. 

The original looked like this  Instep Stroller/Bike Trailer over 8 years ago. 
I used it a lot. 
Then we moved and I couldn't. 
Then we moved again and I could. 
Then the straps and fabric started breaking and ripping.
I sat and looked at it knowing I could restyle it.
I removed all the fabric and added the board
(there are actually 2 boards for added strength), 
I stapled the fabric over the board to make it pretty 
and then attached the car seat base for the car seat to snap into.
It is very sturdy and comfy for the rider, she usually falls to sleep in it.


So, we have moved again and there is not a real great place to ride with the trailer 
and my sad bike is all rusted from living in humid Arkansas.
I didn't want to get rid of the trailer though. 
I worked hard on it and we had great fun using it.
I had this idea in my brain for another restyle.
I didn't know how to do it though. 
I did a lot of searching online....nothing. 

I thought.
I was on Pinterest searching "Rickshaw" when I found MuddyJ
There it is!!!
I was so excited that I went out that day and got the supplies. 
I put it together within a few days,
then had to wait for it to warm up so I could use it. 

So here are the photos to look at to get an idea of how I put my Jaunting Cart together.
 Photo above is the bend in the front bar that crosses in front of me at my hips. 
I measured it and laid it on the sidewalk with some of it hanging off the cement and bent it. 
I had to jump on it at bit....these pipes are pretty strong. 
I then held it up on end next to me and bent it the rest of the way with my foot.


 Photo above is the base of the car seat and the view of the screws 
and washers used to attach it to the wood platform that I attached to the trailer frame.

 The back of the trailer. 
I wanted the connection to be straight across,
but I didn't bend them to the right length. 
The elbow joint helped join them perfectly.


 The connector piece.


 Front right showing one of the 4 U bolts I have on the cart. 
This is where the trailer hitch arm extended from originally.
  I removed that because I could not fold it under after the other restyle I made and I will not be using it with my bike anymore.


 The straps that I bought for less than $6 at an Army Surplus store. 
They are connected to the pipes with 4 carabiners.

 Un-assembled


 This is the re-bar that I use inside the conduit pipe for extra reinforcement. 
It is 5 feet long. 
The conduit pipe is strong, 
but I wanted to have a bit more support for it with all the walking and jogging.

 Conduit pipe with the re-bar before I put the handle bar on.


 Back view again


 Rear left


Rear left view from the back.


 Pool noodle, straps and connector for front bar. 
Sorry about the pink hue...something is wrong with my camera.


 Removable tires


The view of the underside.


Me with it assembled 

My list of supplies:
4 conduit pipes
2 re-bars
1 elbow joint
4 conduit connecters
4 U bolts
4 carabiners
One pool noodle (using half)
straps from Army Surplus

This is it compared to my van. 
I wanted the bars/handles to be long enough so that as I get stronger and start running, 
that I don't get injured by hitting my feet on it behind me. 
It just gives plenty of space for walking/jogging/running stride.
 

So that is it. 
Please leave comments or any questions.
I will be posting photos and maybe funny things people say to me as I use it. :)
Thanks for visiting.